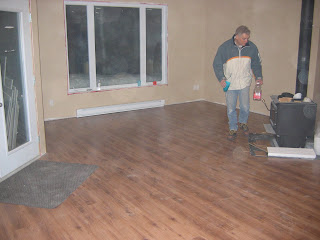
 I found an absolutely great deal for laminate flooring from Dale's Home Building Center in Otter Lake. I paid under $1 per square foot, and the stuff was absolutely wonderful to work with.
Attributes of the Laminate Floor:
The flooring was a great quality and has the following attributes:
- 8.3 mm in thickness
- resistant to burns, scratching, fading and stains
This laminate required no glue! In fact the material just snapped together.
Tools Required:
All the tools that I needed were:
- A hammer, although a rubber mallet would have been better
- A table saw, although a circular saw would work
Be sure to lay the planks so that is looks right in the space. Here is a few tips:
- Lay it so that it length ways as you come into the room. We laid ours so that it was laid in the direction that you entered from the front door.
- Try to avoid ending at a door but rather run the laminate though the doors to other rooms. It is easier to just run to the door and then put a T-molding to cover the restart of the laminate in the next room - but it just does not look as nice. More work - but a great result!
- Do the flooring before you install the interior doors - that way the laminate will be under the doors frames - hence no ugly gaps!
- Be sure to stagger your joints!
- Use a scrap piece of laminate plank to use to hammer (with a mallet) - this avoids damaging the tongue and groves.
- Be sure to put 1/4 inch spacers against all the walls to create the required expansion space, AND to protect the walls from the pounding with the mallet.
- Always install the laminate in the direction that is easiest. In our case it was left to right. It just just snaps together MUCH easier!
- Make sure you create at least a 1/4-inch space around all obstacles like pipes.
- Get and use Knee pads!
- Make sure the entire floor is clean prior to laying the laminate - scrap and vacuum all bumps - fit any voids
- Use a vapour barrier - underlay material. When you lay it do not overlay the material.
- Measure twice! You are going to get tired - mistakes happen.
- Use the piece you cut at one end as the starting plank on the next run - it often is exactly the right piece to create the right stagger - and your waste will be next to nothing
Coming Up:
Related Posts:
;-)
